이 설명서는 RemotePixel 앱의 설치부터 고급 설정까지 단계별로 안내합니다. RemotePixel은 웹 인터페이스를 통해 안드로이드 기기에 이미지, 슬라이드쇼, 텍스트를 원격으로 표시할 수 있는 앱입니다.
This manual guides you through the installation to advanced settings of the RemotePixel app. RemotePixel is an app that allows you to remotely display images, slideshows, and text on Android devices through a web interface.
1. 시작하기
1. Getting Started
1.1 앱 설치
1.1 App Installation
- Google Play 스토어에서 'RemotePixel' 검색 또는 여기를 클릭하여 앱 페이지로 이동하세요.
- '설치' 버튼을 클릭하여 앱을 다운로드하고 설치하세요.
- 설치가 완료되면 '열기' 버튼을 클릭하여 앱을 실행하세요.
- Search for 'RemotePixel' in the Google Play Store or click here to go to the app page.
- Click the 'Install' button to download and install the app.
- Once installation is complete, click the 'Open' button to launch the app.
RemotePixel 앱 화면 - 앱 실행 시 서버가 자동으로 시작됩니다
RemotePixel App Screen - Server starts automatically when the app launches
1.2 초기 설정
1.2 Initial Setup
- 앱을 처음 실행하면 권한 요청 창이 표시될 수 있습니다. 앱이 정상 작동하기 위해 필요한 권한들을 허용해 주세요.
- 앱이 실행되면 자동으로 서버가 시작되고 화면에 접속 URL이 표시됩니다.
- 설정 메뉴에서 ID와 비밀번호를 설정하여 보안을 강화할 수 있습니다.
- When you run the app for the first time, permission request windows may appear. Please allow the permissions necessary for the app to function properly.
- When the app launches, the server starts automatically and displays the access URL on the screen.
- You can set an ID and password in the settings menu to enhance security.
팁: 앱을 장시간 사용할 예정이라면 전원 설정에서 화면 자동 꺼짐 시간을 길게 설정하거나, 배터리 최적화에서 RemotePixel 앱을 제외하는 것이 좋습니다.
Tip: If you plan to use the app for an extended period, it's recommended to set a longer screen timeout in the power settings or exclude the RemotePixel app from battery optimization.
2. 팝업 메뉴와 웹 인터페이스 접속
2. Popup Menu and Web Interface Access
2.1 팝업 메뉴 사용하기
2.1 Using the Popup Menu
- 안드로이드 기기의 앱 화면에서 화면 가운데를 길게 터치하세요.
- 팝업 메뉴가 나타나면 연결 정보를 확인할 수 있습니다.
- 메뉴 상단에 표시되는 URL이 웹 인터페이스 접속 주소입니다.
- 이 메뉴를 통해 화면 설정, 콘텐츠 제어 등 다양한 기능에도 빠르게 접근할 수 있습니다.
- Long-press the center of the screen in the app on your Android device.
- When the popup menu appears, you can check the connection information.
- The URL displayed at the top of the menu is the web interface access address.
- This menu also provides quick access to various functions such as screen settings, content control, and more.
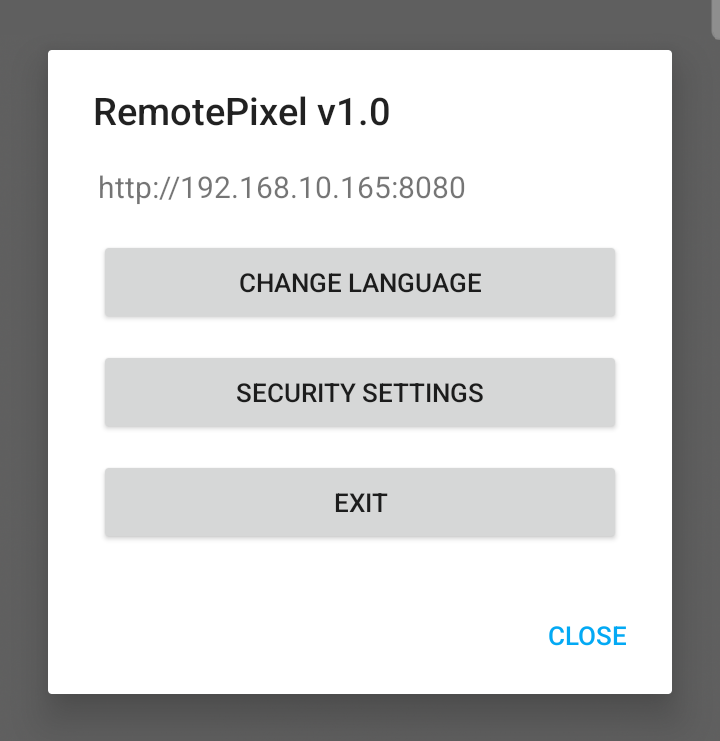
화면 가운데를 길게 터치하여 표시되는 팝업 메뉴 - 상단에 웹 인터페이스 주소 확인 가능
Popup menu that appears when long-pressing the center of the screen - web interface address visible at the top
팁: 팝업 메뉴에 표시된 URL을 다른 기기에서 브라우저에 입력하여 웹 인터페이스에 접속할 수 있습니다.
Tip: You can access the web interface by entering the URL displayed in the popup menu into a browser on another device.
2.2 웹 인터페이스 연결하기
2.2 Connecting to the Web Interface
- 팝업 메뉴나 앱 화면에 표시되는 URL을 확인하세요. 이 URL은 같은 네트워크 상의 다른 기기에서 접속할 수 있는 웹 인터페이스 주소입니다.
- 컴퓨터나 다른 기기의 웹 브라우저를 열고 확인한 URL을 입력하세요.
- 보안 설정을 했다면 ID와 비밀번호를 입력하세요.
- 성공적으로 연결되면 RemotePixel 웹 제어 인터페이스가 표시됩니다.
- Check the URL displayed in the popup menu or on the app screen. This URL is the web interface address that can be accessed from other devices on the same network.
- Open a web browser on your computer or another device and enter the URL you checked.
- If you've set up security, enter your ID and password.
- Once successfully connected, the RemotePixel web control interface will be displayed.
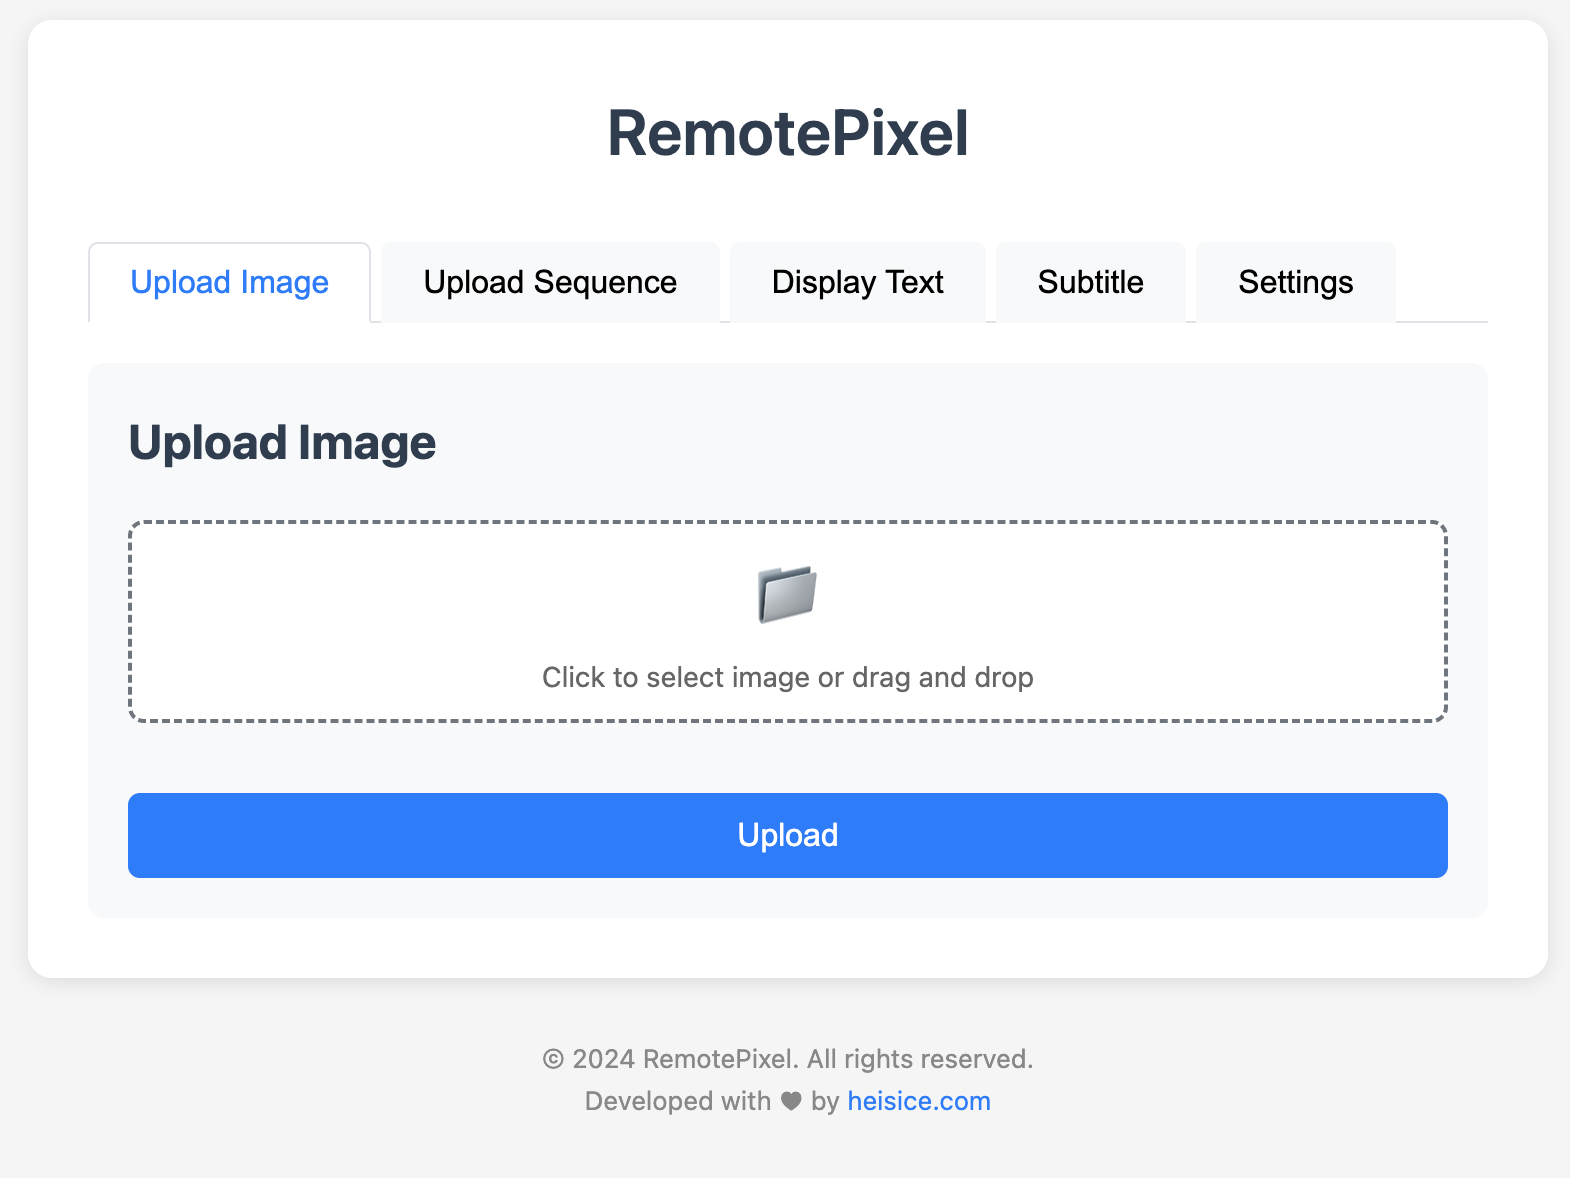
RemotePixel 웹 인터페이스 - 이미지 업로드 화면
RemotePixel Web Interface - Image Upload Screen
주의: 보안을 위해 공용 Wi-Fi나 보안되지 않은 네트워크에서는 반드시 ID와 비밀번호 보호를 설정하세요.
Warning: For security, always set ID and password protection when using public Wi-Fi or unsecured networks.
3. 콘텐츠 전송하기
3. Sending Content
3.1 이미지 전송
3.1 Sending Images
- 웹 인터페이스에서 '이미지 업로드' 버튼을 클릭하세요.
- 단일 이미지 또는 여러 이미지를 선택하여 업로드하세요.
- 업로드 버튼을 클릭하면 선택한 이미지가 안드로이드 기기에 표시됩니다.
- Click the 'Upload Image' button in the web interface.
- Select and upload a single image or multiple images.
- Click the upload button to display the selected image on the Android device.
3.2 텍스트 메시지 전송
3.2 Sending Text Messages
- 웹 인터페이스에서 '텍스트 메시지' 탭을 선택하세요.
- 원하는 텍스트를 입력하고 글꼴, 크기, 색상 등을 설정하세요.
- '전송' 버튼을 클릭하면 텍스트가 안드로이드 기기에 표시됩니다.
- Select the 'Text Messages' tab in the web interface.
- Enter the text you want to send and set the font, size, color, etc.
- Click the 'Send' button to send the text to the Android device.
3.3 슬라이드쇼 설정
3.3 Setting Up a Slideshow
- 여러 이미지를 업로드한 후 '슬라이드쇼 설정' 섹션을 확장하세요.
- 이미지 전환 시간, 전환 효과 등을 설정하세요.
- '슬라이드쇼 시작' 버튼을 클릭하면 안드로이드 기기에서 이미지가 자동으로 전환되며 표시됩니다.
- After uploading multiple images, expand the 'Slideshow Settings' section.
- Set the image transition time and effect.
- Click the 'Start Slideshow' button to automatically transition and display images on the Android device.
3.4 자막 전송
3.4 Sending Subtitles
- 웹 인터페이스에서 '자막' 탭을 선택하세요.
- 자막 텍스트를 입력하고 글꼴, 크기, 색상, 위치 등을 설정하세요.
- '전송' 버튼을 클릭하면 자막이 화면 하단에 표시됩니다.
- 자막은 이미지나 슬라이드쇼와 함께 표시되며, 필요할 때 숨기거나 다시 표시할 수 있습니다.
- Select the 'Subtitles' tab in the web interface.
- Enter the subtitle text and set the font, size, color, position, etc.
- Click the 'Send' button to display the subtitle at the bottom of the screen.
- Subtitles can be displayed with images or slideshows, and can be hidden or shown again when needed.
팁: 자막은 이미지나 슬라이드쇼와 함께 사용하면 더 효과적인 콘텐츠 전달이 가능합니다.
Tip: Using subtitles with images or slideshows can make content delivery more effective.
4. 고급 설정
4. Advanced Settings
4.1 다중 기기 제어
4.1 Multiple Device Control
여러 대의 안드로이드 기기를 동시에 제어하려면:
To control multiple Android devices simultaneously:
- 각 기기에 RemotePixel 앱을 설치하고 서버를 시작하세요.
- 웹 브라우저에서 각 기기의 URL에 접속하세요. 여러 탭을 사용하면 편리합니다.
- 각 기기별로 원하는 콘텐츠를 전송하세요.
- Install RemotePixel app on each device and start the server.
- Access each device's URL in a web browser. Using multiple tabs can be convenient.
- Send the desired content to each device.
5. 문제 해결
5. Troubleshooting
5.1 연결 문제
5.1 Connection Issues
- 웹 인터페이스 접속 불가: 기기가 같은 Wi-Fi 네트워크에 연결되어 있는지 확인하세요.
- URL 접속 오류: 방화벽이나 네트워크 설정을 확인하세요. 일부 네트워크에서는 포트가 차단될 수 있습니다.
- 연결이 자주 끊김: Wi-Fi 신호 강도를 확인하고, 가능하면 기기를 라우터에 더 가깝게 배치하세요.
- Unable to connect to the web interface: Check if the device is connected to the same Wi-Fi network.
- URL connection error: Check your firewall or network settings. Some networks may block ports.
- Connection is frequently interrupted: Check Wi-Fi signal strength and, if possible, place the device closer to the router.
5.2 화면 표시 문제
5.2 Screen Display Issues
- 이미지가 표시되지 않음: 이미지 파일 형식이 지원되는지 확인하세요. JPG, PNG, GIF 형식을 권장합니다.
- 텍스트가 잘림: 웹 인터페이스에서 글꼴 크기를 조절하거나 텍스트 양을 줄이세요.
- 화면이 자동으로 꺼짐: 기기의 화면 자동 꺼짐 시간을 연장하거나 '항상 켜짐' 설정을 활성화하세요.
- Image not displayed: Check if the image file format is supported. We recommend JPG, PNG, GIF formats.
- Text is cut off: Adjust the font size in the web interface or reduce the text amount.
- Screen turns off automatically: Extend the screen timeout in the device settings or activate 'Always On' setting.
6. 팁과 활용 예시
6. Tips and Usage Examples
6.1 최적의 경험을 위한 팁
6.1 Tips for the Best Experience
- 오래된 태블릿이나 스마트폰을 활용하면 비용 효율적입니다.
- 태블릿을 벽에 고정하려면 전용 벽 마운트나 스탠드를 사용하세요.
- 전원 공급이 안정적인지 확인하고, 가능하면 기기를 충전기에 연결한 상태로 사용하세요.
- 대형 화면에 표시할 경우 고해상도 이미지를 사용하세요.
- Using an old tablet or smartphone can be cost-effective.
- If you want to fix the tablet to the wall, use a dedicated wall mount or stand.
- Check if the power supply is stable and, if possible, use the device with a charger.
- If you're displaying on a large screen, use a high-resolution image.
6.2 활용 예시
6.2 Usage Examples
- 가정: 거실에 디지털 액자로 설치하여 가족 사진을 슬라이드쇼로 표시
- 레스토랑: 메뉴판이나 일일 특선 메뉴 표시
- 소매점: 제품 정보나 프로모션 표시
- 사무실: 회의실 일정, 공지사항, 또는 회사 핵심 지표 표시
- 교육: 강의실이나 복도에서 수업 정보, 일정 또는 공지사항 표시
- Home: Install as a digital frame in the living room to display family photos as a slideshow
- Restaurant: Display menu or daily special menu
- Retail: Display product information or promotion
- Office: Display meeting schedule, notice, or company core indicator
- Education: Display class information, schedule, or notice in the classroom or hallway